


August 25, 2021 at 9:25 p.m.
- Debuting in 2015, Apple Music now has 72 million users — approximately half of Spotify’s base.
- To grow its audience, Apple released an Android version of its music app in late 2015.
- Data show that about 40 million Android users installed Apple Music between 2015 and 2019.
- Despite its popularity, Apple Music is one of the worst Android apps today, often requiring re-installation to fix recurring issues.
A Brief History of Apple Music
Although Apple was one of the first to debut a legitimate digital music business, emerging subscription services completely sidelined the company. Like Netflix, but with more extensive libraries and a focus on music, services such as Spotify gave users millions of songs for one low monthly subscription fee. Spotify still offers a free service, which may play a large part in its market hegemony.
Rising to the occasion, Apple once again made the case that they were saving the music industry. Critics complained that music subscription services destroyed artist revenues, as many didn’t even earn a penny for each song streamed. Apple suggested changing this; however, the company pays only $0.004 more per stream than Spotify. Although this is twice as much as its chief competitor, it’s still a pittance. An artist must stream 127 tracks to earn a dollar on Apple Music.
Apple Music launched in September of 2015 with numerous defects. On all of my Apple devices, music playback would halt randomly, requiring user intervention. The flaw was evident with both downloaded and streamed music. For years, other issues plagued Apple Music, such as multiple tracks added to playlists and defective searches. The app, which appears to be developed by a lesser team at Apple, seems to succumb to new defects faster than they’re fixed.
Over the years, Apple continues to add new features to its music subscription service. Its music library now encompasses over 75 million songs. Recently, Apple Music started offering lossless audio quality, with some tracks available in remarkable 24-bit format.

Most Music Apps Horribly Defective
The unfortunate truth is that most music streaming apps are woefully defective. I’ve tried them all, and they all have problems, both on iOS and Android. It’s astonishing because video apps such as Netflix and Hulu are remarkably reliable and trouble-free.
With just about every app, the prospect of putting together a playlist and listening to music for hours on a drive, flight, or at home is untenable. At some point, your music will stop playing on just about every app. Even worse, some apps will randomly change the track order of an album or playlist (without intentionally shuffling). All music subscription apps are frustrating. Apple Music is just as bad as the competition.

Apple, Amazon, Google, Spotify, and others likely underestimate the software development skills required to create a stable music streaming app. Working in the Valley, I’ve seen such hubris result in poor quality apps that never improve over time. This seems evident with Apple Music, particularly on Android, where one must occasionally resort to extreme measures to enjoy music without annoying defects.

Before we embark on troubleshooting, let’s look at how to get the basics working with Apple Music for Android. Feel free to skip ahead if you’re interested in solving a particular problem. Otherwise, read on…
Getting Started with Apple Music for Android
Apple Music isn’t compatible with all Android devices. You don’t have to worry if you have a modern flagship Android device, such as a Samsung Galaxy or OnePlus. For those with older Android devices, although your phone can run Apple Music it may still prove to be unusable. Fortunately, Apple gives new users a free three-month trial, making it easy to try the service before paying for anything.
Apple Music requires Android 5.0 (Lollipop) or later to run. Given that Android 11 is the current version of Google’s popular mobile operating system, Apple Music appears to run on many devices. Realistically, although you can install Apple Music on an older Android device, it doesn’t mean it will operate smoothly. Even on my OnePlus 8 Pro with a mature Android 11, Apple Music exhibits quirky behavior. This isn’t necessarily Google’s fault, as most apps function reliably. In fact, I find Android to be a more stable user experience than iOS.
Apple Music can also run on Chromebooks supporting Android apps. Appledystopia has not tested this configuration; however, it appears that Apple created a special version of its music app for Chromebooks.

If you wish to install Apple Music on your Android device, first launch the Play Store. Type “Apple Music” in the top search field and then tap on the magnifying glass. Apple Music’s app information appears below the search field. Tap on “Install” to add Apple Music to your Android device.


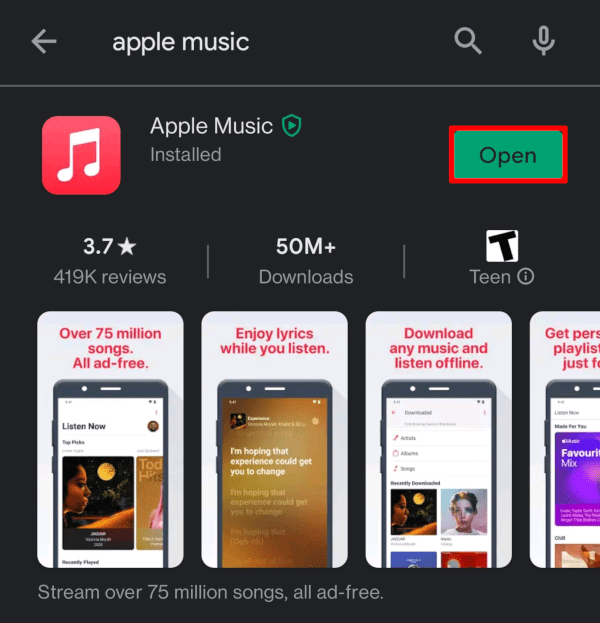
A rotating circle appears while the app installs. When Apple Music completes its installation, you’ll see an “Open” button. Launch Apple Music by tapping on this button.
Upon opening Apple Music, a lengthy legal agreement welcomes Android users to the Apple ecosystem.

Scroll down to the bottom of the text and tap on “Agree” if you accept the terms. You must agree to Apple’s legal terms to use the app and service. Once you agree to the terms, you’ll see a screen explaining what’s new in Apple Music.

Tap on Continue once you’re familiar with the new features.
If you’re a Verizon customer, you may be eligible for six months of free Apple Music.

Tap on “Check with Verizon” to find out if you’re eligible. If not, you can enjoy three months of free music, as long as you haven’t had a free trial of Apple Music in several years. (I got a free trial back in 2015, stopped using the app for years, and got another three months for free in 2021.)
For the sake of brevity, we’ll assume you’re eligible for a three-month free trial. Tap on “Get 3 months Free from Apple”. You’ll see a screen explaining that you can use Apple Music for free until the specified date. After that, it will be $9.99 per month. You must cancel Apple Music a day before the renewal date to avoid billing. The screen shows the first billing due date. Once again, users can opt for the free trial or go for Verizon’s special offer.

We’ll assume you’re going for a standard three-month free trial, so tap on the “Try It Free” button.
There are three options for the free trial — Individual ($9.99/mo), Family (up to 6 people at $14.99/mo), and College Student ($4.99 with free Apple TV+). The Individual plan provides an Apple Music subscription for one person. The Family plan supports up to six users; however, they must enroll in your Family plan. Although you could share the Family plan with your friends, Apple’s Family sharing allows access to virtually all of your digital goods, including iCloud storage. Thus, it’s not a good option unless you’re incredibly close with your friends.

We’ll assume that you’re using the Individual plan for the sake of brevity. With this option selected, tap on Start Trial.

Apple Music will now prompt you to sign on with an Apple ID. If you don’t have one, tap on Create New Apple ID and follow all of the steps to join Apple’s ecosystem. If you have an existing Apple ID, select the corresponding option. The app will ask you to sign in with your Apple ID, after which you’ll finally be able to use Apple Music.
When you first sign on to Apple Music, the app asks if you wish to turn off billing receipts. This is a scam intended to tax the forgetful. It’s best to get records of your bills.

Tap on OK to have your Apple Music billing receipts sent to your email account. After you tap OK, you’ll see another dialog box ask if you want to send diagnostic data to Apple. I suggest tapping “Don’t Send” as these telemetric systems use data and often introduce defects.

You’re now able to use Apple Music and listen to over 75 million songs, with many encoded in stunning lossless audio quality. Let’s look at playing a song, album, artist, and playlist on Apple Music.
How to Play a Song on Apple Music for Android
The most fundamental function of any music subscription app is to play music. With Apple Music, users can opt for a song, album, artist, or even a genre-based playlist.
Playing a song on Apple Music is easy. First, tap on the Search icon on the bottom navigation bar.

The Search screen appears, with a search field located under the screen’s title. Tap in the search field to enter text entry mode. Next, type in the name of a song you’d like to hear. For the sake of this tutorial, we’ll go with Led Zepplin’s Stairway to Heaven. By simply typing “stai”, Led Zepplin’s popular track is already the second search result. You can also see Stairway to Heaven listed below the search results, along with the album cover. Simply tap on this item to start playing the song. It’s really that easy!

With a song playing, it’s now possible to switch to the Now Playing view, which often displays lyrics for popular songs. Simply tap on the track bar at the bottom of the screen to launch the Now Playing view. You should see a screen with track information on top and lyrics streaming along with the music. If you don’t see this, tap on the lyrics button, which resembles a speech balloon with quotation marks. The Now Playing view also features an easy way to see the Playing Next list, in addition to casting tools that enable you to play music on bigger speakers.
How to Play an Album on Apple Music for Android
For those who still enjoy listening to an entire album, Apple Music usually makes this enjoyable task easy. The first step is to find an album. Tap on the Search button on the bottom toolbar to launch the search view. The Search screen will appear. Tap in the Search field and then type the name of an album. For the sake of this tutorial, we’ll search for the most popular rock album of all time, Pink Floyd’s Dark Side of the Moon. Simply typing “dark” reveals this seminal album in search results.

Tap on the search result, and Pink Floyd’s famous album is the first result on another, more detailed screen.

Tap on it to reveal the album’s detail page. From here, you can tap Play, and it should work.
Unfortunately, sometimes playing the album from this screen doesn’t work. Occasionally, when one taps the play button, nothing happens. If this is the case, tap the “…” button on the top right of the screen and then select “Play Next”. Now, tap on the Now Playing panel near the bottom of the screen, just above the navigation buttons. Press the Play button on the Now Playing screen and then press skip track (>>) to move to the next song. Your album should now play.
How to Play an Artist’s Music on Apple Music for Android
With 75 million songs available, Apple Music features works from millions of recording artists. The app makes it easy to listen to top songs from your favorite performers.
First, tap on the Search button at the bottom of the screen.

The Search screen will appear. Tap on the Search field and type in part of an artist’s name. A list of search results appears. Tap on the performer or group’s name in search results.

Another search results list appears, populated with artists, songs, albums, and other data related to your search. Tap on your desired recording artist.

The performer’s home screen appears. Tap on the play button next to the group or singer’s name to play their most popular tracks.

Apple Music will now play the artist’s songs in order of popularity.

How to Create and Edit a Playlist on Apple Music for Android
Creating a playlist is one of the most critical aspects of using any music subscription program. If you’re taking a road trip, working out, or going for a hike, a playlist will save you from fiddling with your device. Playlists enable users to put together a collection of their favorite songs from various artists, albums, and genres.
Creating a playlist in Apple Music is easy and can be accomplished in a variety of ways. The first step is to find a song or album you’d like to add to a playlist. Let’s start with a song. First, tap on the Search button at the bottom of the screen to find a song. The Search screen appears. From here, tap on the Search field and enter a song name. A list of search results appears. Tap on the one that best resembles the music you wish to add to a playlist. Another list of search results appears. Tap on the “…” icon to the right of the song you wish to add. A menu of options appears. Tap on “Add to a Playlist…”. Next, tap on the “+” button to add a new playlist. A playlist editor window appears. You can see that Apple Music added your song to the playlist. Simply give the playlist a name and description, then tap on the checkmark button on the top right to save it.
Adding an album works the same way. First, search for the album and tap on the search result. When you’ve found the album, tap on the “…” next to it and select “Add to Playlist” from the menu.
You can also add music directly to a Playlist. First, tap on Library at the bottom of any screen. Next, tap on Playlists. You’ll see all of your playlists displayed on the screen. Tap on the one you’d like to add music to. Now tap on the “…” menu and choose “Edit Playlist” from the drop-down menu. You’ll see the same playlist editing screen from when you first created it. Now tap on the “Add Music” button. The Library screen appears. From here, select music you’d like to add by checking boxes next to each song or album. Press the checkmark button at the top right when you’re done adding music on each screen. This will take you back to the playlist. You can tap on “Add Music” again and repeat the process until your playlist is complete.
Rearranging the order of songs in a playlist is a simple task. First, open the playlist by tapping on the Library button at the bottom of the screen. Next, tap on Playlists and then select the list you’d like to edit. Open the “…” menu and choose “Edit Playlist”. Now, use the handle icons on the right of each track to move them in your preferred order. When you’re finished, tap on the checkmark icon on the top right. If you don’t do this after adding new songs or editing the playlist, Apple Music won’t save the changes, and the app doesn’t warn you about losing changes if you exit the screen.
How to Listen to a Human-Curated Playlist on Apple Music for Android
Human curation is one of Apple Music’s most appealing features. Instead of algorithms recommending music based on your listening patterns, Apple Music’s selections benefit from human intervention. Overall, I haven’t found the suggestions more insightful than competitors’. In fact, they seem to miss out on many associations between artists that only a well-tuned algorithm can detect.
Beyond recommendations, Apple Music’s human curators create playlists. The popular music streaming app also has live radio stations hosted by real humans. For those looking to explore new music or are simply tired of fiddling with their smartphones, Apple Music’s playlists and radio stations offer easy access to songs chosen by music enthusiasts.
Accessing a playlist is easy, and it’s a central feature of Apple Music. Simply launch the app, and they’re right there on the Listen Now screen, which is really the home screen. If you already have the app open or it launches where you left off, simply tap on the Listen Now button on the bottom of the screen to view Apple Music’s curated playlists.
Once you’re on the Listen Now screen, scrolling down reveals countless playlists based on your tastes. Some of the recommendations may be albums, but others are playlists based on the music you’ve already listened to or related genres. Tap on any playlist or radio station to open it, then tap on its play button to start listening.
If you’re in the mood for live radio, you can easily access it by tapping the Radio button on the bottom navigation bar. From here, you can listen to both live radio and previously aired programs. Just tap on the radio program or hit the play button on its information panel. You’ll join the program in midstream, just like the good old days.
How to Listen to a Podcast on Apple Music for Android
Unlike other music streaming apps, Apple Music offers little support for Podcasts. The app only provides a few Podcasts that are relevant to music. This may seem surprising, as Apple created the technology; however, it’s of little consequence. The few Podcasts that supposedly exist seem buried among radio programs, some of which may serve dual purposes.
The lack of Podcasts in Apple Music may disappoint some users; however, myriad Podcast apps provide access to these trendy audio gems. Searching the Play Store for Podcast apps reveals dozens of compelling options. It would be nice to create combined playlists of Podcasts and music, which some competitors like Spotify can offer. It’s surprising that Apple, the creator of the Podcast, doesn’t provide these recordings on its own music streaming app.
How to Cast Apple Music on Android
Casting provides the ability to beam music (and video) from a smartphone, tablet, or computer to an audio receiver. The receiver could be a TV, Chromecast dongle, or smart speaker. With casting, it’s easy to listen to music on big speakers with theoretically better audio quality than Bluetooth.
Fortunately, Android has casting integrated into the operating system. Casting requires that both the sending device (Android smartphone) and receiving device (Chromecast dongle) are on the same WiFi network. You must be connected to WiFi to see the Chromecast icon.
You can connect to your casting device anytime you wish to listen to music on an external system. Simply tap on the Casting icon on your Android device’s top menu bar. If you don’t see it, you may need to swipe down to reveal the control. Once you see the cast button, activate it and connect to your preferred external device. You’ll need to enter a code to make the connection for the first time. Now you can launch Apple Music and enjoy audio on a high fidelity system.
How to Play Apple Music for Android on Bluetooth Speakers
If you don’t have a WiFi network, Bluetooth provides acceptable audio quality, depending on the device. Bluetooth standards have improved over the years, but overall, even the best receiver won’t sound as good as Chromecast.
Connecting to a Bluetooth receiver or speaker varies depending on the brand, but the process is similar. First, turn on your Bluetooth device. Next, make sure to activate Bluetooth on your Android device.

Go to Bluetooth settings and tap on Pair New Device. Find the device you wish to pair in the list and tap on it. Your Android device may prompt you to enter a code. Typically, 0000 works in most cases, but refer to your manual or look up the code online if this doesn’t work.
Once connected, simply play audio from any source, and it will transmit to the connected Bluetooth device. You can adjust the volume using your phone’s or Bluetooth device’s controls. Some Bluetooth devices don’t have volume controls. In this case, adjusting the volume on your phone is the only option.
How to Adjust Audio Quality Settings in Apple Music for Android
Apple Music recently upgraded the audio quality of most of its music collection. The popular music app now supports “lossless” audio, providing music that sounds as good or better than a CD, with some tracks sounding indistinguishable from the original master.
For a long time, Apple Music and iTunes provided 256 kbps AAC files, which are inferior to compact discs. Consumers traded off convenience for sound quality; however, for several years, they’ve had the bandwidth and storage capacity for high-quality audio. Competitors like Tidal and Amazon offered high-definition music for some time, with many albums available in stunning 24-bit resolution. Responding to its competitors, Apple finally started streaming in a lossless format.
By default, Apple Music DOES NOT stream or download in lossless quality. This is a business decision, as the company incurs higher data center costs from high-definition audio files. Most people can’t tell the difference, as they listen to music on their phone speakers or with mediocre headphones. Also, high-definition music takes longer to download and occupies more space on one’s smartphone. If you’re doing this over a cellular connection, it could be expensive if you pay for data by the GB.
Turning on lossless music is easy. First, tap on the Now Playing button at the bottom of the screen. The Now Playing view appears. From here, tap on the “…” menu at the top of the screen and select “Settings”. Scroll down on the Settings page and tap on “Audio Quality”. Switch on “Lossless Audio” to enjoy music at its highest quality. You can also activate lossless audio quality for cellular connections from here.
Keep in mind, streaming lossless music over a cellular connection can quickly burn through gigabytes of data in a matter of hours. If you don’t have an unlimited plan or your carrier throttles you, I suggest limiting lossless audio to WiFi-only by keeping “Cellular Streaming” set to “High Efficiency”.
Once you activate lossless audio, more options appear on the Audio Quality screen. You can now toggle lossless audio for WiFi and Downloads. If you re-install Apple Music, these settings default back to standard audio quality.
As you can see, adjusting audio quality is a simple task. Let’s look at how to download music with Apple Music for Android.
How to Download Apple Music Songs and Albums on an Android Device
Downloading music is critical to enjoying songs on the go. Whether you’re in your car, a plane, or in the wilderness, downloading is key to enjoying content anywhere without experiencing interruptions or incurring excess cellular data charges. Fortunately, Apple Music makes it easy to download music and access it offline.
Before you download music, you must add it to your music library. This seems like a poor design, as one can imply that users intend to add downloaded music to their libraries. Nonetheless, before you download music, you add it to your library.
First, find a song or album that you’d like to download. Let’s start with a song that’s not in our library. Tap on the Search button to reveal the Search screen. Next, tap on the search field and enter the name of a song you’d like to download. Tap on the song in search results and then tap on the “…” icon next to the song in the resulting list. Select “Add to Library” from the menu. Tap on the “…” menu again, this time selecting “Download”. Your song will begin downloading immediately.
You can view download progress directly on the track itself. A gray circle turns red as your device downloads more of the track. If you’re downloading an album, there are progress indicators next to each track.
Once you’ve downloaded a song, a new “Downloaded” category appears on the Library screen. Use this screen to access downloaded music when you’re on the go, your network goes down, or you just want to conserve cellular data and battery power. (Playing downloaded music saves your smartphone’s battery because streaming data over wireless networks consumes significant energy.)
How to Use Apple Music with Android Auto
Android Auto is a popular hands-free automotive computing platform compatible with various smartphones. Similar to Apple’s CarPlay, it provides apps and processing power for automobiles supporting the technology. With Android Auto, drivers can listen to music, receive turn-by-turn navigation guidance and enjoy other in-car innovations without averting their eyes from the road.
First, download Android Auto from the Play Store and configure the app to work with your automobile. Next, using your car’s display, activate Android Auto. Using the Android Auto app in your car’s display, launch Apple Music and follow the on-screen instructions to begin playback.
How to Cancel Apple Music for Android
If the free trial doesn’t work out, you’re not listening to much music, or you’re curious about a competing music subscription service, you may want to cancel Apple Music. Fortunately, Android makes this task easy. Unfortunately, Apple bypasses Android’s subscription management system; however, canceling Apple Music isn’t overly complicated.
Since Apple manages subscriptions outside of the Google Play Store, you’ll need to launch Apple Music to halt billing. Once the app is open, tap on the More menu (…) on the top right and select Account. A screen with multiple account management options appears. Tap on Manage Subscription. From this screen, you can cancel your free or paid trial by tapping on the relevant link. You can also alter your plan or pay for a whole year, saving almost $20.
Unlike many free trials, Apple Music will stop access to the service as soon as you cancel. They do this in the hopes that users will forget. I highly recommend setting a calendar event for two days before your Apple Music trial elapses if you’re not interested in paying for the service.
You must cancel at least 24 hours before the next billing cycle to avoid incurring charges. Apple contends that this only applies to the free trial and discounted plans. It’s probably best to cancel two days in advance and capture the confirmation screen for a receipt.