

June 20, 2017 at 3:13 p.m. PST
Apple TV offers several options for configuring subtitles. This article explores how to adjust subtitles on Apple TV.
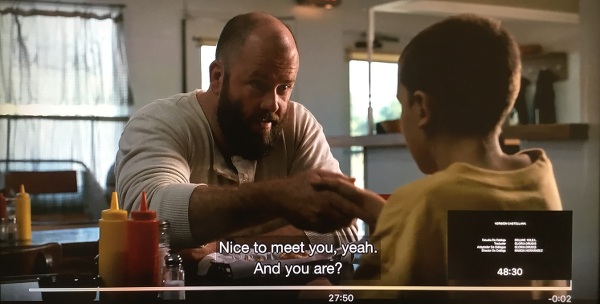
It’s not always easy to follow dialog on a TV show or movie. Sometimes explosions or music can cover up an actor’s voice. You may need to turn down the volume late at night to avoid disturbing others. Thick accents can also be difficult to understand. Turning on Reduce Loud Sounds can help, but it’s not always the perfect solution. For all of these reasons, I almost always have subtitles turned on. Fortunately, Apple TV’s support for subtitles is excellent.
Critics often accuse Apple of making simple products that aren’t customizable. This generalization, like most, is woefully inaccurate. Apple TV actually offers more control over subtitles than competing TV devices. Apple offers the customization options that most people want. It’s never offered in a cynical way, where some useless feature is used as marketing fodder.

Apple TV offers a variety of configuration options for subtitles, but it’s best to start with the basics. Let’s take a look at how to turn subtitles on and off.
Turn Subtitles On and Off on Apple TV
There are a few ways to turn on subtitles on Apple TV. Siri offers the most convenient method. Simply hold down the Siri (microphone) button on the remote and say “turn on subtitles”. Telling Siri to “turn off subtitles” will remove them from the screen. This works with most apps, but not all. It won’t work with the CBS News app. Siri will display “I can’t turn on subtitles at the moment”.
Swiping down on a currently playing video reveals the Info panel. From here, users can swipe right to the Subtitles panel to turn on the feature. Subtitles can also be turned off. This doesn’t work in all apps, but it works in most. Again, the CBS News app doesn’t support the feature as they have overridden the Info panel for their own purposes.
If you can’t turn on subtitles with either of the previous methods, you’ll have to go to the Settings app. You can launch Settings by holding down the Siri button and saying “settings”. From there, go to Audio and Video > Subtitle Language. Select the appropriate subtitle language and return to your video. You should now see subtitles. Subtitles can be turned off from this setting too.
As you can see, Apple offers three different ways to turn subtitles on and off. You can do a lot more with subtitles on Apple TV. It’s possible to make them bigger, transparent or change background colors. Customization support for subtitles on Apple TV is actually quite powerful. Let’s take a look at how to adjust subtitles on Apple TV.
How to Adjust Subtitles on Apple TV
Apple’s Accessibility features offer peerless support for people with disabilities. Anyone can take advantage of these features to customize various aspects of Apple TV. Accessibility offers plenty of options for configuring Apple TV subtitles. You can even design your own presets and switch between them. It’s far more advanced than anything I’ve seen on competing products.
Starting in the Settings app, click on General > Accessibility > Subtitles and Captioning > Style. You can see a list of various presets, such as Default, Large Text and Classic. Clicking on Edit Styles reveals user-definable styles and the ability to add a new style. Let’s walk through how to add a new style.
Click on New Style and then Description. Give your subtitle style a descriptive name and then click on Done. Next, click on Font and choose a style you prefer. Make sure to set Video Overrides Style to Off. This will ensure that your subtitle choice will work with all videos and they can’t be overridden. If you don’t do this, apps such as Netflix will just show the default style.
You can set a variety of advanced options for the font, such as Monospaced Serif, Serif, etc. These allow you to further define how the font looks on the screen. Make sure to set Video Overrides Style to Off if you change any of these options. Click the Menu button on your remote until you are back on the main style options screen.
Now that you have selected a font, it’s time to set the font size. There are five options for font size, ranging from Extra Small to Extra Large. Again, make sure to turn Video Overrides Style to Off. You will need to do this for all of the subtitle customization options. For the sake of not sounding redundant, turning this option off won’t be mentioned much more going forward. When you’re finished choosing your font size, click the Menu button to return to the main style options screen.

You may have noticed that as you edit your subtitle style, a preview is shown on the left side of the screen. This helps you get a better feel for how subtitles will look. You must be aware that certain subtitle appearance options can be hard to read. Videos have dynamic colors, so if you were to create black subtitle text with no background, it would be illegible on dark video content. Make sure to think about how your subtitle choices will work with different colors.
Font Color is the next option to customize. Apple TV offers 8 different colors for subtitles, ranging from white to black. Make sure to pick a color that will work with different backgrounds. Keep in mind, you can also choose a background mask for the subtitles to help them stand out more. This is a small rectangular area that encloses the subtitle, making it easier to read. The truth is, no font color will stand out against every possible video background. Just pick a font color that’s easy to read. I prefer white or yellow, but black also works well against a white background. Experiment until you find something that works well.
The next set of style options control the subtitle background’s appearance. The subtitle background is the small rectangular region that contains the subtitles. The background makes it easier to see subtitles against the constantly changing colors of video content. You can set both the color and opacity of the background. Choose a color that contrasts with your preferred text color. Also, make sure to set the background to be transparent enough to see your video content, yet opaque enough to yield legible subtitles. You can also remove the background by setting opacity to 0%. This makes it easier to see the underlying video, however, reading the subtitles can prove challenging. There are a few tricks that can help make background-free subtitles more legible.
The advanced style options provide further customization choices for subtitles. Text Opacity allows users to make subtitle text transparent. This is really useful if you opt for larger font sizes. You can adjust it so that you can read the subtitles, yet still see the underlying video. Text Edge Style is very useful if you decide to opt out of a background. I created a background-free style that uses a white font but a Uniform edge style. This provides a black border around each character of white text. This is my preferred style, because it works on just about every background yet doesn’t obscure the video. You can even take it a step further and make the text semi-transparent, providing a clearer view of the underlying video. The trade-off is that subtitles may be harder to read. There are other text edge style options, however, apart from Uniform, they seem a bit gimmicky.
The final advanced subtitle option is Text Highlight. This option is actually the same thing as the Background option. It encloses the text in a rectangular background with various color and opacity options. I’m not sure what they were thinking in Cupertino with this one.
My preferred style is medium-sized white opaque text with no border and a uniform text edge. It’s the perfect blend of legibility and visibility. It doesn’t obscure video content at all, yet I can see it against virtually any video background. Here are all the settings for my favorite subtitle style:
Font: Helvetica
Size: Medium
Color: White
Background Color: Black (we won’t see the background due to the opacity setting)
Background Opacity: 0%
Text Opacity: Opaque
Text Edge Style: Uniform
Text Highlight Color: Black (we won’t see the background due to the opacity setting)
Text Highlight Opacity: 0%
Remember to set Video Overrides Style to Off on each individual settings screen.
Switching Subtitle Style Presets
Now that you have a few subtitle presets, it’s possible to switch between them. Unfortunately, this can’t be done using either Siri or the slide-down Info panel. I tried telling Siri to “turn on subtitles style one” or just saying “subtitles style one” to no avail. Siri just thinks I want subtitles on. You can only change subtitle styles through the Settings app. With the Settings app open, simply click on General > Accessibility > Subtitles and Captioning > Style and then pick a style. Although this is a cumbersome process, it’s not something you will be doing often. Once you find your preferred subtitle style, you’re likely to stick with it.
Deleting Subtitle Presets
You may accumulate too many subtitle presets over time. As you try them out, you may find that many of your experiments just didn’t work. It’s easy to delete subtitle styles. Go to Settings > General > Accessibility > Subtitles and Captioning > Style > Edit Styles and then click on the Edit button on the top right of the screen. Click on the garbage can icon next to each style you wish to delete and confirm deletion. Click on the Done button when you’re finished. You can’t delete the three built-in settings styles — Default, Large Text and Classic.
Subtitles Styles Not Showing Up on Videos
If the subtitle style you just created isn’t showing up during video playback, you probably forgot to turn off Video Overrides Style. This setting, when turned on, will allow apps to override the subtitle style you created. You will need to go back to the subtitle editing screen (Settings > General > Accessibility > Subtitles and Captioning > Style > Edit Styles and pick your style) and turn this off for every setting option. It may seem like a pain, but this actually gives users and developers fine-grained control over who gets to alter particular subtitle settings. For example, you can enforce that subtitles are large, but the app can control all other aspects. It’s surprisingly flexible for Apple, however, they do take Accessibility seriously.
Subtitles Styles Automatically Deleted
While configuring subtitles, I ran into a rather serious defect. All of the subtitle styles and changes I made just vanished. This actually happened twice, so it’s not that rare. I was pretty upset, and gave up on customizing subtitles. I just went with the default. A few days later, I revisited the subtitle configuration screens, and they were back. It turns out that restarting Apple TV will restore any saved subtitle styles. You can restart Apple TV by going to Settings > System > Restart. You can also hold down the Home and Menu buttons on your Siri Remote until you see the light on your Apple TV base unit flash rapidly. Release both buttons when the light starts to flash, and your Apple TV will restart. You should see your subtitle settings restored after Apple TV restarts.
There are some other minor flaws with editing subtitles. I have found that some settings don’t persist and may reset back to default. This may happen if you go back to the list of subtitle presets accidentally by hitting the Menu button too many times. This can also create another generic style preset with the “Style [n]” title. It’s a bit quirky, but when you do it right, the style you create should persist. If one of the settings resets, just set it back to the desired value.
Apple TV is Configurable
Apple TV is a configurable device. Critics love to make the claim that Apple products are simple and don’t allow for customization. The reality is, you can do much more with subtitles on Apple TV than with any other competing TV device. This is important, because not everyone has the same visual capabilities. Nearsighted people may prefer larger text. I actually created my own style, which I prefer to the default. Apple doesn’t let you configure every aspect of Apple TV, and neither does any other competing product. In the end, Apple TV is a television device and its customization options make sense for its purpose.